Please note that this documentation is for the most recent version of this extension. It may not be relevant for older versions. Related documentation can be found in the documentation directory of the extension.
PayPal Checkout configuration
Attention:
PayPal Checkout requires the Pro version of the shop extension!
Attention:
The PayPal Checkout requires the entry of the full URL in the site configuration of your TYPO3 instance!
PayPal Account
You will need a PayPal account. Log-in to PayPal and open https://developer.paypal.com. Go to My Apps & Credentials in the menu and create a new app. Take note of whether you want to create a Live or a Sandbox account. After creating it, you should have the following information
- (Sandbox) Account: This is an email address.
- Client ID: This is a hash value that identifies the client.
- Secret: This is also a hash value. Make sure you keep it secret!
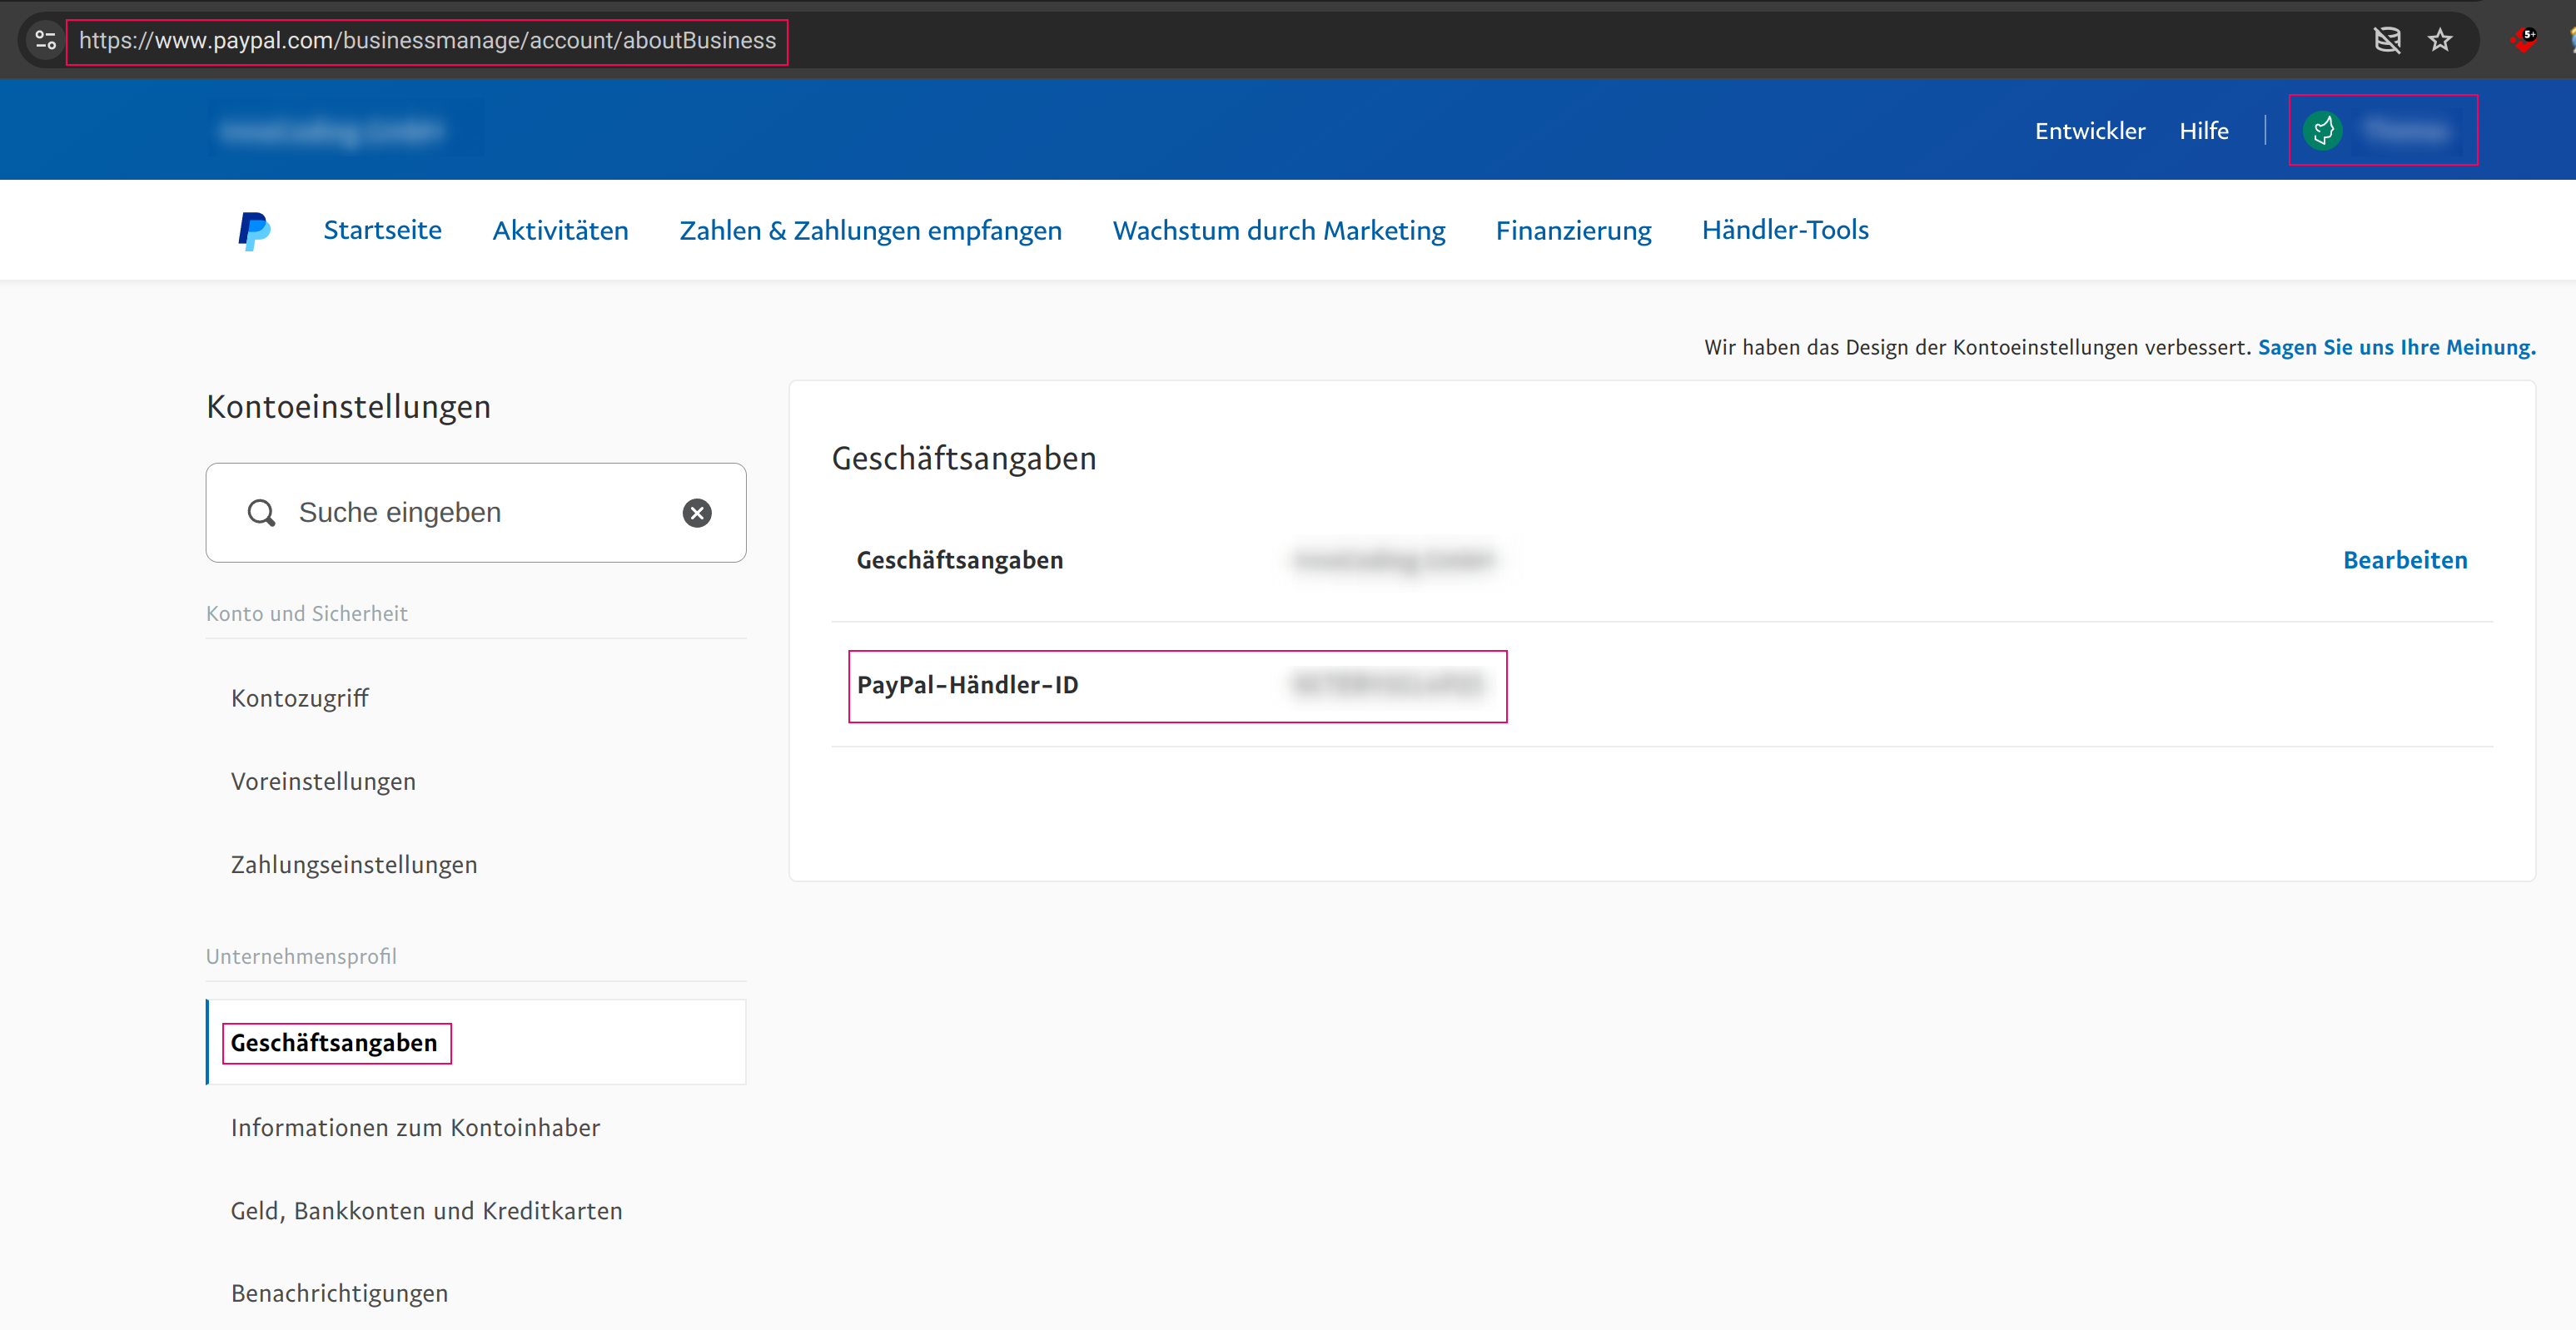
To set up the PayPal checkout, you only need the (sandbox) account. (See the sandbox and payPalId fields in the Checkout Configuration section). The payPalId is equal to the Account-ID of PayPal, you can find it on Profil -> Kontoeinstellungen -> Unternehmensprofil -> Geschäftsangaben.

For testing purposes you will need an extra account which you can set up under https://developer.paypal.com/developer/accounts/.
Warning:
If your environment is password protected the webhook can't be executed. Please make sure that the webhook can be accessed.
Checkout configuration
- active Activate/deactivate checkout
- checkoutPid Enter the page Uid of the checkout page.
- successPid Enter the page Uid of the success page. This is the page you will be redirected to after successful payment.
- cancelPid Enter the page Uid of the cancel page. This is the page you will be redirected to if you cancel the payment process.
- callbackPid Enter the page Uid of the callback page. The callback page is accessed asynchronously by Paypal to confirm payment.
- service The checkout service PHP class is assigned here. This can be modified if the process needs to be changed.
- sandbox Activate/deactivate the sandbox.
- payPalId Enter the (sandbox) account name created in PayPal.
Add additional actions after a successful payment
If you need actions to be carried out after successful payment, use the PayPalPaid event listener.
- Create a new slot:
<?php namespace YourVendor\YourExtension\EventListener; use CodingMs\ShopPro\Event\BasketOrder\PayPalPaidEvent; class DoSomeThingEventListener { public function __invoke(PayPalPaid $event): void { /* Do something */ } } - Then register the event listener in
Configuration/Services.yaml:services: YourVendor\YourExtension\EventListener\DoSomeThingEventListener: tags: - name: event.listener identifier: 'myListener' event: CodingMs\ShopPro\Event\BasketOrder\PayPalPaid
Debugging
If a callback does not work, you can activate debugging. Read how this works in the How To/Debugging section.
Testing
PayPal callbacks are best tested by logging in to https://developer.paypal.com (using your real login data). Access the IPN Simulator under SANDBOX.
Enter your callback URL in the IPN handler URL then under Transaction type select Cart checkout. A large number of form fields will appear below the form. In the item_number field enter the Uid of your basket order so that the callback can find the right order.
Calling the checkout success page ends in a 404 error
Calling the checkout success page results a:
Page Not Found
Reason: Request parameters could not be validated (&cHash empty)
Solution 1.
Open the Installtool and disable pageNotFoundOnCHashError setting: [FE][pageNotFoundOnCHashError] = false
Solution 2.
Exclude the parameters of the request like this (LocalConfigration/settings.php):
'FE' => [
    'cacheHash' => [
        'enforceValidation' => true,
        'excludedParameters' => [
            'PayerID',
        ],
    ],
],